I purchased my first electric guitar more than 10 years ago, a Fender Squier Bullet, hard tail (non-tremolo) that came as a guitar ‘starter kit’ along with a small practice amplifier and electronic tuner for just 199USD.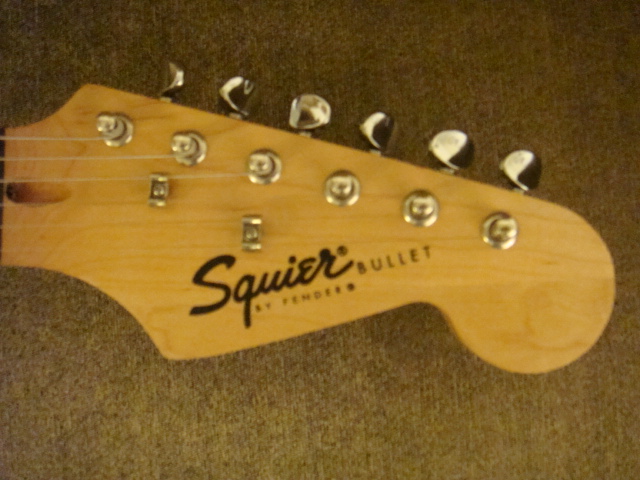
Squier guitars were first produced in Japan, starting in 1982. My particular guitar was manufactured in Indonesia in 2000, has a shiny black finish and a three piece maple neck with ebony fingerboard. The electronic pots were quite good, no noise, good smooth feel, but the 5-way pickup selector switch made allot of noise when selecting the different pickup patterns. The pickups themselves had no discernible tone difference when selecting and were in my opinion the weakest part of the guitar, making it NOT sound at all like a ‘Strat’.
So, in order to improve the guitar as best I could, I decided to change out all the electronics with good ol’ made in USA components. For pickups I chose the Fender Vintage Noiseless Pickup set, which includes three CTS Pots and a tone capacitor. Add to that a CRL brand lever switch, a Switchcraft jack, and the electronics are complete. For cosmetics, since the Fender Noiseless pickups are aged white, I got a set of Fender aged white knobs for Volume, the two Tones and for the lever switch.
I had actually done this same upgrade first on my son’s Squier Stratocaster. This was a 2006 tremolo model, made in China. Everything went in without any drilling or modification. But as I started my Bullet upgrade, I found that I needed to drill out 3/8″ holes in the pick guard for the USA Pots, increase the diameter of the pickup screw holes to 1/8″ and I needed to route out more room for the bottom tone Pot (The CTS pots are larger diameter than the originals), deeper for the CRL lever switch and a little more room for the heavier duty Switchcraft 1/4″ phone jack in the body itself. This added considerably more trouble to the upgrade project. But in the end, my little Squier has new life and it looks very cool too.
Guitar Upgrade
Required components:
1. Original Fender Vintage Noiseless Pickups, aged white, Fender (USA)
(set includes 2x1M Ohm CTS Pots for tone, 1x500K Ohm CTS volume Pot, .022uf capacitor, 470p capacitor and 220k ohm resistor. The included Fender wiring diagram is incorrect.)
2. 5 way pickup selector switch, CRL brand (USA)
3. 1/4″ mono phonejack, Switchcraft brand (USA)
4. Aged white knob set (1-volume, 2-tone), Fender (USA)
5. Aged white pickup selector knob, Fender (USA)
The new knob sets are not just for cosmetics. The Squier models use metric shafted pots that have smaller splined shafts. These knobs won’t fit the CTS Pots without using excessive force.
Required tools:
1. #2 Philips screwdriver
2. diagonal wire cutters and wire stripper
3. soldering gun, preferably with hi-watt turbo switch when soldering to pot’s body
4. nut drivers for pots and phone jack
5. 3/8″ drill (if pickup guard doesn’t support the 3/8″ shaft of CTS Pots) alternately, a round file can be used here to enlarge the holes in the pick guard to accept the 3/8″ shaft CTS Pots.
6. 1/8″ drill (the pickup mounting screws are a little bigger than the original)
7. Some routing tools as I found later, routing was not deep enough for the CRL lever switch, the bottom tone CTS pot needed more room so need to take some wood out and the 1/4″ phone jack needed some more breathing room than the original cheap jack.
Procedure:
1. Remove the guitar strings
2. Remove the two mounting screws for the audio output jack bracket.
3. Pull the bracket slightly out of the body and un-solder the audio leads.
4. Set aside the bracket with 1/4″ phone jack.
5. Remove the three knobs and the selector lever knob.
6. Remove all eleven screws holding the pickup guard.
7. Lift the pickup guard slightly and swing down away from the body.
8. There will be only one ground wire from the hard tail bridge (or tremolo bridge), un-solder it from the ground point on the Pot body.
9. The entire pickup guard assembly can be completely removed.
10. Set aside the guitar for now (return to case).
11. With a really hot iron, un-solder all the wires between the Pot bodies.
12. With normal iron temperature, unsolder all the Pot and lever switch connections.
13. Flip the pickup guard over, remove the two screws holding the lever switch and remove all three nuts securing the Pots with a nut driver.
14. Remove the two screws each for the three single coil pickups.
15. At this point, you should have a pile of parts and a clean pickup guard with nothing attached.
16. Check to see if the 3/8″ shaft CTS Pots fit the holes in the pick guard. If they do, you are set. If not, enlarge the holes to 3/8″ by drilling and/or filing. I actually did not use a drill, although I have one. I just turned the 3/8″ bit by hand to open up the holes in the plastic pickup guard.
17. Mount the three Pots, referring to the photo for the proper placement and orientation. Place the star washer so that it is between the Pot and pick guard. Place the flat washer outside just under the nut. Double check that volume and tone pots are in the right locations and that the legs are oriented according to the photo. Tighten the nuts snugly while holding the Pot to prevent turning.
18. Mount the CRL lever switch with two Philips head screws, referring to the photo for the proper placement and orientation.
19. Mount the pickups. They include screws and small rubber tubing. My original pickups had springs between the pickup and pick guard. For the new pickups use the tubing between pickup and pick guard. Place the bridge pickup (the one with yellow and black wires) at the bridge or lowest position. The neck and middle pickups are physically the same (white and black wires). I needed to slightly open up the screw mounting holes, using a 1/8″ drill and again just spinning by hand.
20. Next is getting everything wired up. Before starting I twisted the pickup wires and this will also help reduce noise. I use cable ties to make everything neat.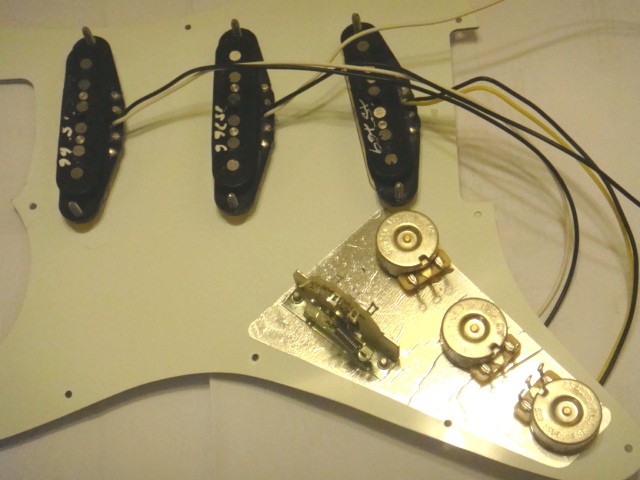
I cut, stripped about 3/16″ and tinned the pickup wires to their right length. I used the extra pickup wire and previous wiring to connect all Pots to the same ground and to wire all the signals. The 680p capacitor and 220k resistor both connect between the volume pots output and the wiper. This is not shown in the Fender wiring diagram, but it is shown in the Fender Stratocaster Deluxe wiring diagram 010100/1002.
Even the Fender Deluxe wiring has errors in the component designation for the 220K ohm resistor. It is shown as .220K but it should not have the decimal point. The .022uF tone capacitor is also shown as .022K and it should be just .022.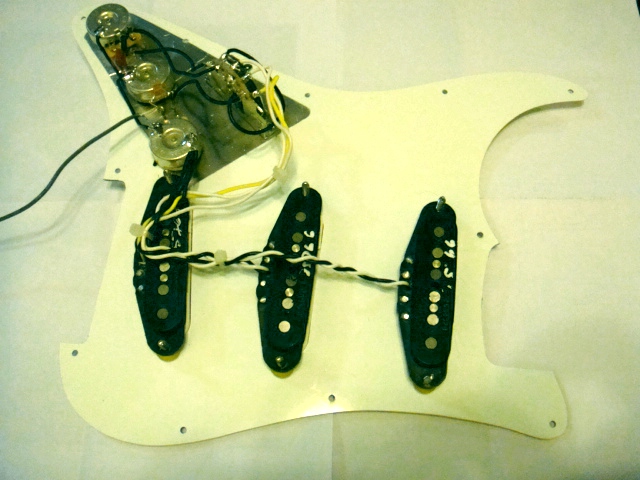
With everything wired and soldered according to the Fender wiring diagram, the pick guard with all electronics is ready to install into the guitar.
This was when I found out that the CRL lever switch was hitting the bottom of the ‘bath tub’ before the pick guard could be flush with the body. The other problem discovered was the lower tone Pot hitting the wall. The Squier pots had a 16mm body diameter while the CTS Pots have 25mm diameter. So I needed to make more room for the CTS Pot and the CRL lever switch.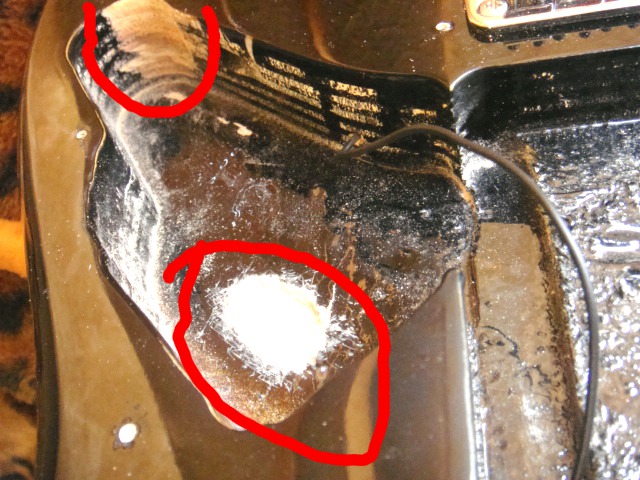
Once there was enough clearance, I was ready to button up. First, I soldered the ground lead from the tail piece to a Pot body, then I threaded the output cable so it could be soldered later to the 1/4″ phone jack. Now the pick guard is in place, so screw it down. Then the next step is to solder the output jack to the wiring, slip it in and screw it down.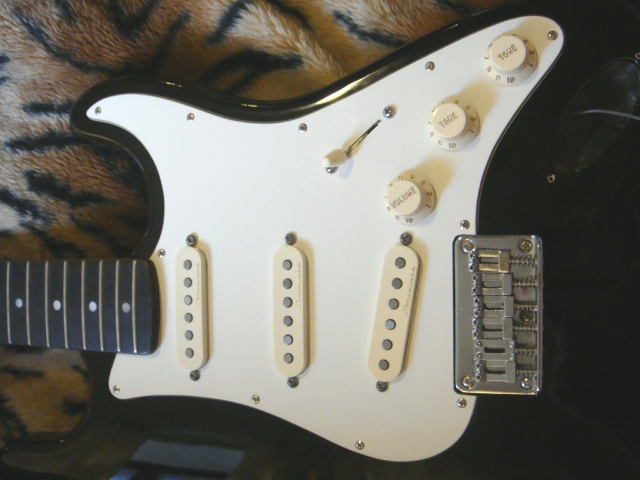
I did a quick electrical test, by connecting the guitar to an amp, checking the lever switch to make sure the pickup selections are right and the volume and tone Pots work.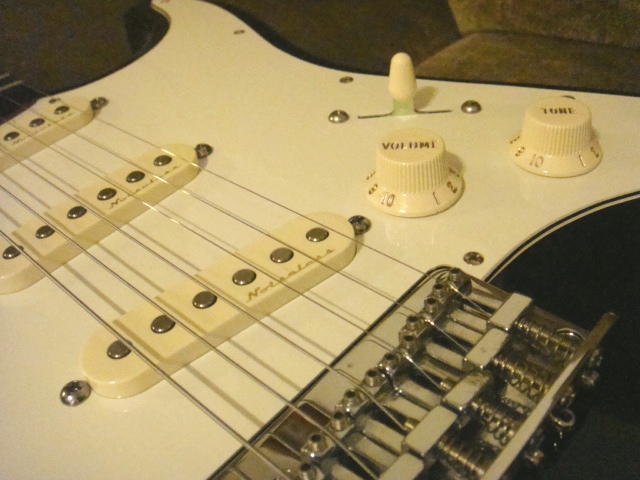
Here is what it looks like after stringing and setting up the neck, action and intonation. Now my little Squier sounds good and it looks good too.
This upgrade is not for everyone, especially since the upgrade parts cost as much as if not more than the original guitar. But, this was my very first electric guitar, so for sentimental reasons, I didn’t mind putting in the bucks and hours of work.